Email

Instagram

Facebook

Pages

Friday, April 28, 2017

Cheeeese! Featuring Lawn Fawn's Elphie Selfie


I adore Lawn Fawn's critters! Don't you?

These sweet little elephants and mouse are from Lawn Fawn's Elphie Selfie.
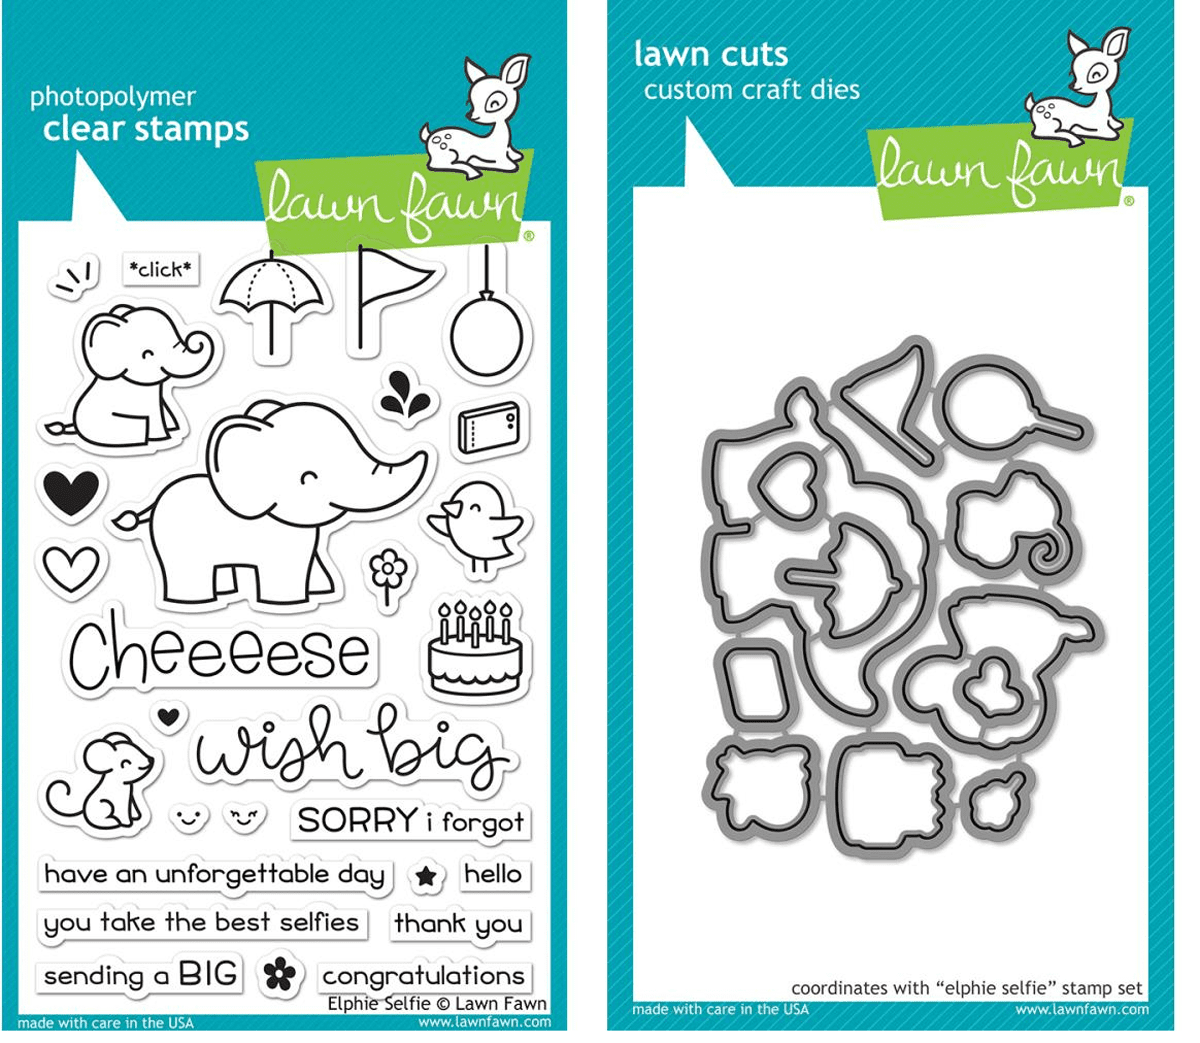

I love all of the accessories and "extras" included in this set! All of these little bits and pieces make it easy to whip up a card for any occasion.

I stamped the critters and camera with Memento Tuxedo Black Ink and did some very simple Copic coloring. To add just a touch of sparkle, I used a Wink of Stella brush pen on their sweet little ears and cheeks. Using the coordinating dies, I die cut each of the images.


For the green tone on tone background, I stamped the "Cheeeese" greeting over and over using Lawn Fawn JalapeƱo Ink. I stamped a simple black banner with the "you take the best selfies" in Versamark sticky ink, dipped the greeting in white embossing powder and then heat set the powder with my heat tool.

The beautiful black floral layer is from the Echo Park Summer Fun 6x6 paper pad. I fell in love with the gorgeous colors and fun designs in this paper pad.

I've included a quick video below! Thank you for stopping by, have a great day!!
Kelley;)

Video:


Supplies:


Tuesday, April 18, 2017

You Make Me Happy! Featuring: Honey Bee Stamps "Honey Buddies Stamps and Dies"


Hello there friends!
In my area of the world ( Washington State) we are getting lots of April showers. I'm hoping, with as wet as it's been, that it's going to be a green and beautiful summer. Our spring weather was the inspiration for today's card.


When looking through all of my Honey Bee stamps, I came across the Spring Honey Buddies stamp set. If you're like me, I often overlook the accessories and "extra" stamps in a set, because I get drawn in by the "main" image. I knew these little extras would be perfect for a card. I paired the umbrella and clouds up with the perfect greeting from the Happiness stamp set.

I started out by using the clouds from the Spring Honey Buddies Dies to dry emboss a background. I arranged the clouds over and over again and ran them through my die machine using embossing mats. I flicked on some Cool Grey Copic markers to give the bottoms of the clouds their stormy grey appearance.


I cut the cute umbrella twice. Once with white card stock, and again with the polka dotted patterned paper.  I did some super simple Copic coloring on the handle of the umbrella as well as the canopy. I clipped the handle off of the patterned umbrella and added it's canopy onto the the white umbrella piece using foam tape. The last things I did was add the die cut and embossed sentiment and the Clear Dew Drops.

I've added a quick process video below and I hope you check it out! While your visiting our YouTube Channel make sure you SUBSCRIBE!

Video:


Supplies:


Sunday, April 16, 2017

That Really Sucks! Featuring Virginia Turtle Stamps


Hello crafty friends!
I knew when I saw this sweet little vacuum cleaner I had to come up with a cute scene. The background was very easy to arrange. Using the Fancy Pants "Joy Parade" 6x6 inch paper pad, I created a wall area with the pink patterned paper and the floor with the solid lime paper. I adhered both of these first, and then add a thin strip of white card stock to act as my baseboard.


The frames and mats for the pictures on the wall were made using several die sets. The square ones are Gina Marie Cross Stitched Square Dies, and Gina Marie Stitched Square Dies. I used the Kat Scrappiness Double Stitched Oval Dies for the kitty picture. After cutting all of the frames and mats, I stamped the images onto the white mat card stock. The Color My World floral image and the Curious Kitties stamp set are both from Honey Bee Stamps. The greeting and vacuum are from the same Virginia Turtle stamp set. I did some very simple copic coloring and added them to the card with foam tape. Lastly, the vacuum is sucking up some "Sparkling Lime" sequins from Kat Scrappiness.

I've included a quick process video below! Make sure you check it out PLUS...did you know that Kat Scrappiness has Daily Deals now? See the KS Daily Deals HERE each day!!

Video:


Supplies:


Tuesday, April 11, 2017

Honey Bee Stamps and the Tuesday Throwdown!

Hello Honey Bee friends!

This week we are taking part in the Tuesday Throwdown Challenge. Each week at the Tuesday Throw Down Blog, they follow a theme and challenge their readers to link projects following that week's rules. This week our theme is "Something Clear"!


I knew this project would be the perfect time to pull out my handy, dandy Fuse Tool, and some beautiful Honey Bee Sequins. Using stamp storage pockets, I created whole card shakers. These little 4.25 x 4.25 inch cards are perfect to slip into little gift bags or attach to gifts cards.


I've included a quick video below on the steps taken to build these little shakers, as well as all the supplies used in the process.  Make sure you stop by and check out the Tuesday Throwdown Blog for lots of inspiration and weekly challenges.


Honey Bee Stamps has lots of fun new products and things to celebrate coming up this month. When you stop by the Honey Bee Stamps You Tube Channel make sure you subscribe! We don't want you to miss a thing ;)

Video:


Supplies:


Sunday, April 9, 2017

Happy Birthday! Featuring: Gerda Steiner's Happy Hoppy Stamp Set


Welcome everyone!

I just love this sweet little bunny from the Gerda Steiner Happy Hoppy Stamp Set. I stamped him in the lower right corner, so I could add lots and lots of balloons carrying him away. The balloons were stamped in Versamark sticky ink and then covered with clear embossing powder. After heat setting the embossing powder I began doing some simple water coloring using Distress Inks.


The heat embossed edges of the balloons acted as little barriers for the water and pigment. Before putting away the Distress Inks, I added tiny flicks of color all over the background.
The little bunny was colored with Copic Markers. I used very light grey colors only in the areas shadowed. Using R20, I added rosey cheeks and ears, and then smoothed out all of the color with the Colorless Blender.


The striped patterned paper is from the Doodlebug Design Easter Express 6x6 paper pad. I die cut it using the Kat Scrappiness Stitched Fancy Scallop Rectangle Dies. I love the interest and design it adds to the edges of the card. A little shimmer was added to the balloons and the bunny's cheeks and ears using Wink of Stella Clear Brush Pen.

I've added a process video below! Please check it out to see all the details of putting this project together.


Video:


Supplies:


Friday, April 7, 2017

Easter Sale @ Kat Scrappiness!

Now is the time to stock up on your spring and Easter products!! Kat has many new sequins, dies, and stamps in stock!!


Surprise Easter Sale at Kat Scrappiness! Save 12% on all things Easter using coupon code EASTERKAT. Valid through 4/10 - https://www.katscrappiness.com/collections/easter-spring


Tuesday, April 4, 2017

How To Make A Graduation Card! Featuring: Honey Bee Stamps HOORAY! Stamps and Dies


Graduation season is quickly approaching and I needed an easy congratulations card to send to a friend's daughter. The new HOORAY! Stamp Set is perfect for all types of celebrations!

Whether you need a baby card, birthday card, anniversary....This set has it all!


I started out by stamping the rainbow background using the MISTI Creative Corners. Using the corner magnet pieces and the triangles, I was able to line up the HOORAY! greeting nice and straight every time.


The greeting for the the front of the card was made using the matching HOORAY! Honey Cuts Die Set. It includes both the shadow, which I cut in black card stock, and the word shown here in red glitter card stock. Instead of building my die cut up using thin card stock, I tried using my stash of chipboard. It's nice, thick, and sturdy and was easy to cut with these dies. The chipboard added the dimension I was wanting, without having to make multiple cuts on lots of paper. The color of the chipboard is hidden under the black shadow piece ;)


The rainbow background was adhered to a black top folding card base. I added white card stock trimmed to fit, to the inside of the card, leaving only small black borders. This gives me a light area,  so I can easily write a message. Using the same HOORAY! Stamp Set, I stamped the scripty "congratulations" in black ink. I love how this word fits so nicely at the top. It adds just a little something to the inside of the card.

Please check out the video below! It contains how I used the MISTI Creative Corners to make the rainbow background. Have a great day!


Video:

Supplies: